+ 7.29 추가 )
S3 버킷 보안 설정을 하던 중, S3 사용을 위한 클라이언트로 AmazonS3 대신 S3Client를 사용할 수 있다는 것을 알게 되었다. S3Client가 더 최신 버전이고 태깅 등 추가 기능을 제공하는 것도 있어서 S3Client 사용 방식으로 변경했다. 변경 코드는 맨 아래에 기재해두었다.
프로젝트를 진행하면서 이미지 저장 기능이 필요해졌다.
AWS의 S3를 사용해 이미지를 저장하고 조회할 수 있다고만 알고 있었는데, 이번 기회를 통해 어떻게 이미지를 처리할 수 있을지 정리해보기로 했다.
우아한테크코스에서 제공되는 AWS 계정은 보안 정책 상 여러 제약이 걸려있고, 테스트용으로 쓰기에는 적절하지 않다고 생각해서 개인 계정을 만들고 테스트를 진행했다.
구현하고자 하는 기능은 다음과 같다.
Id, Name, Image, Description을 갖는 Member 라는 객체를 저장한다.
우선, S3 버킷의 접근 정책을 모두 public으로 열어두고 S3와 Spring Boot 프로젝트를 연결해보자.
보안 정책을 바로 적용해보기 보다는 사진이 제대로 올라가는지, 조회할 수 있는지를 먼저 확인해보고 싶었다.
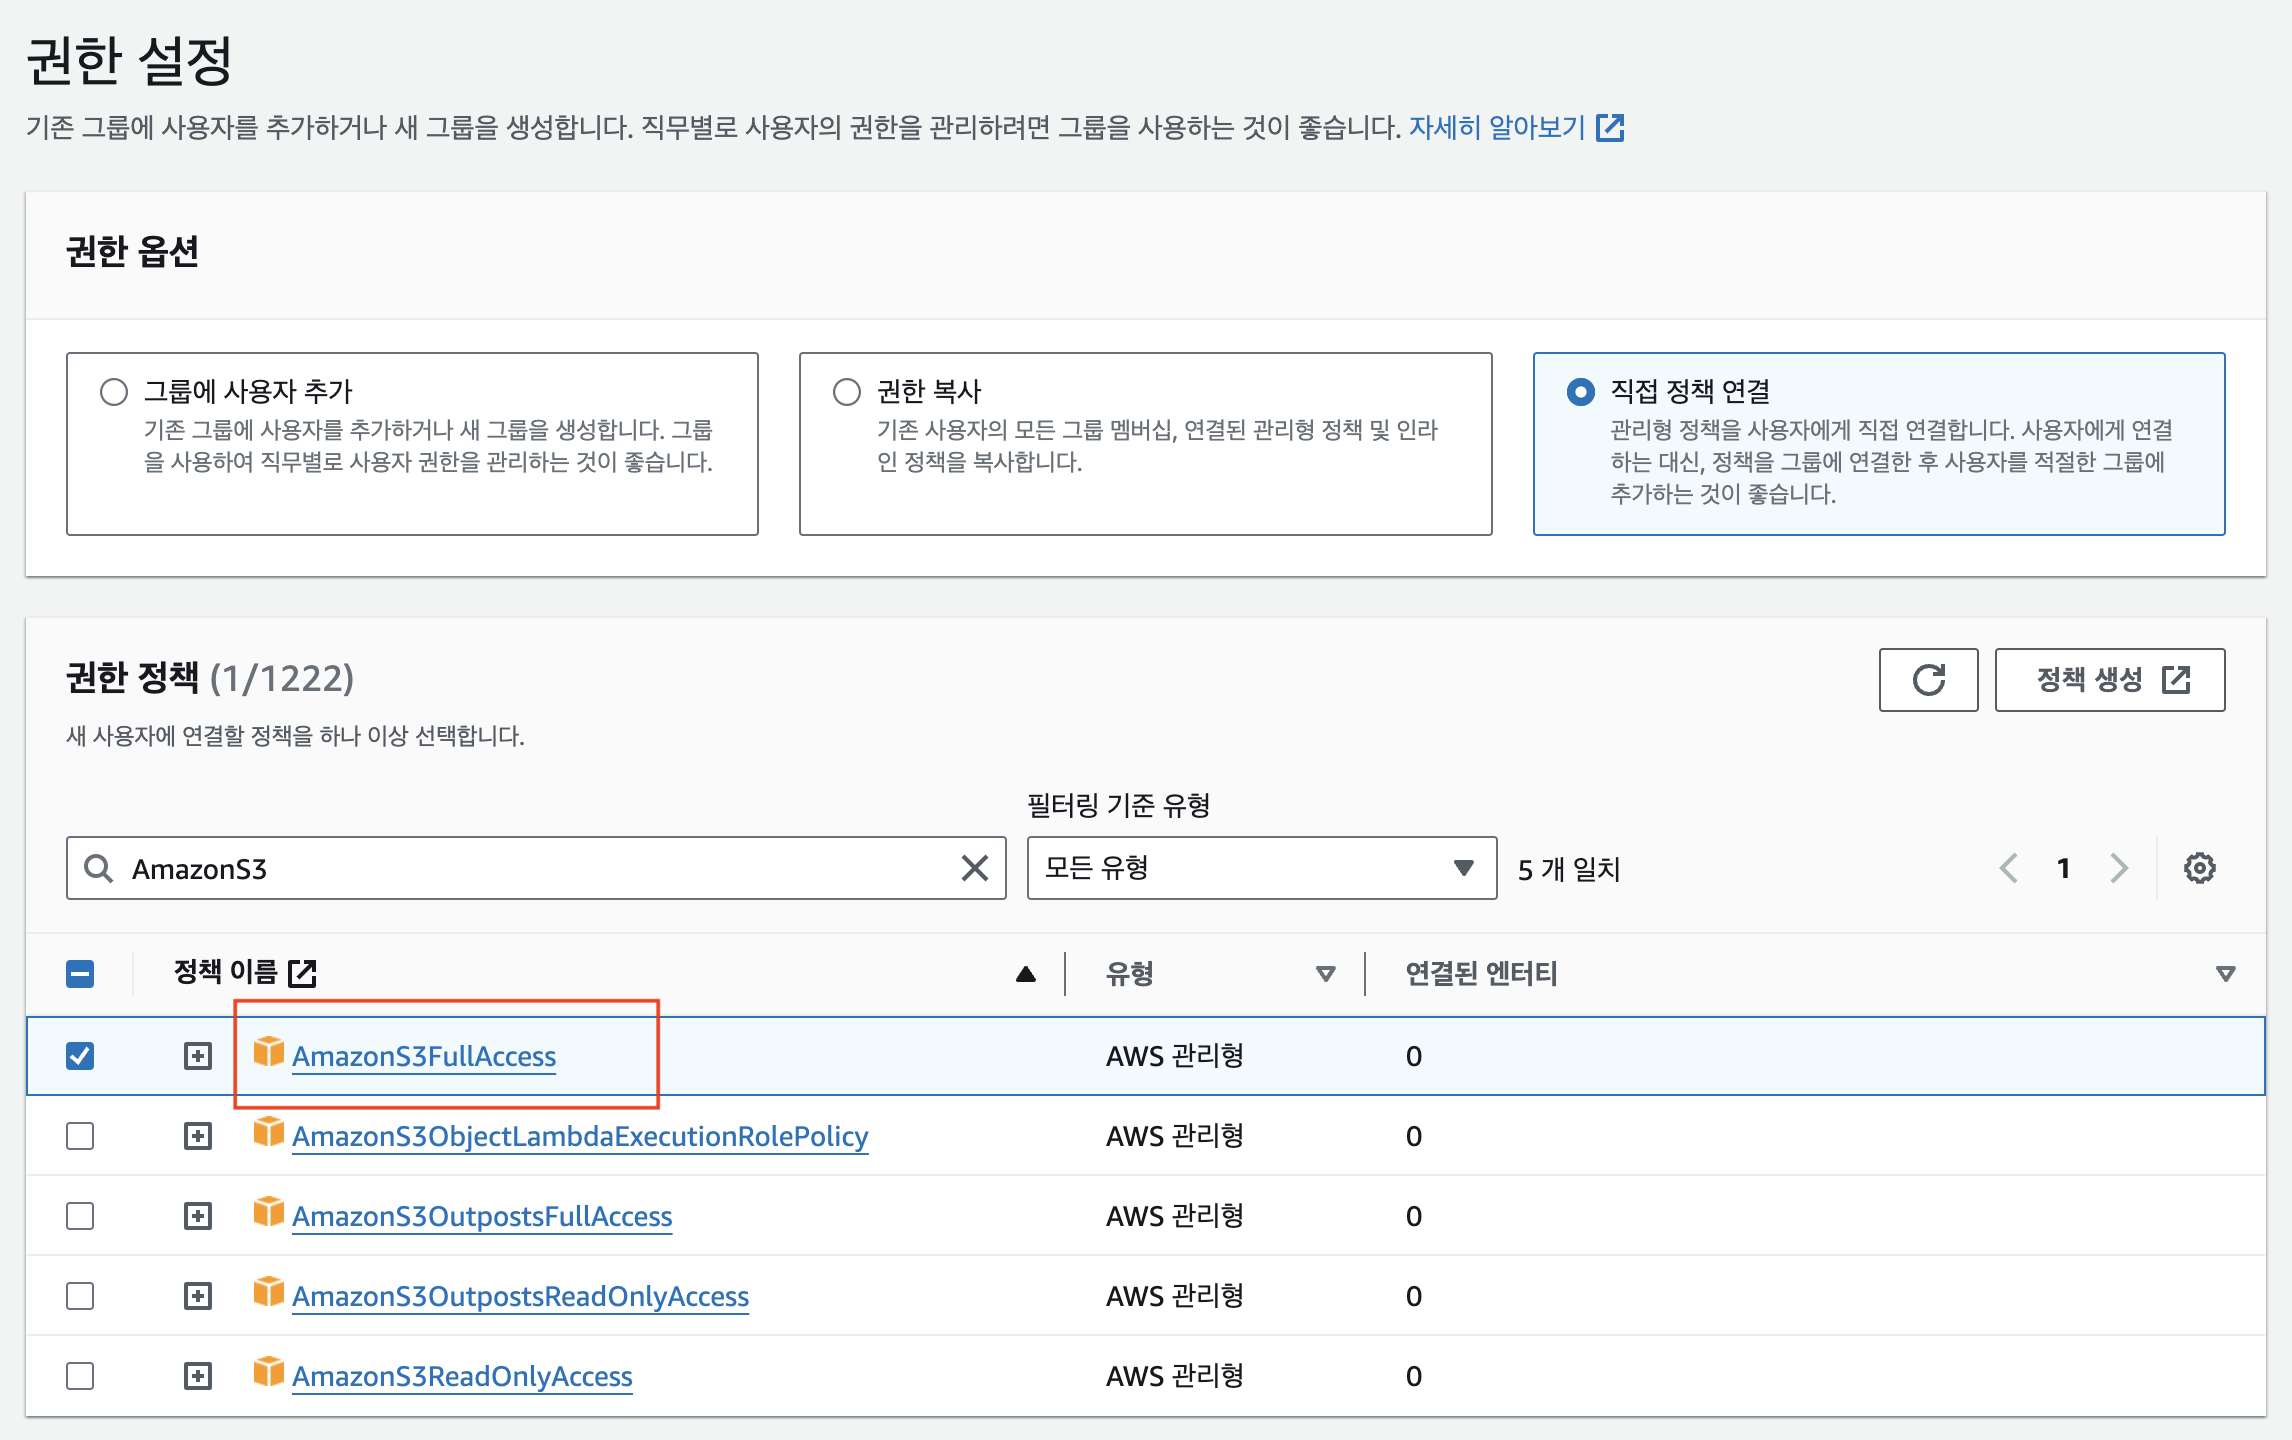
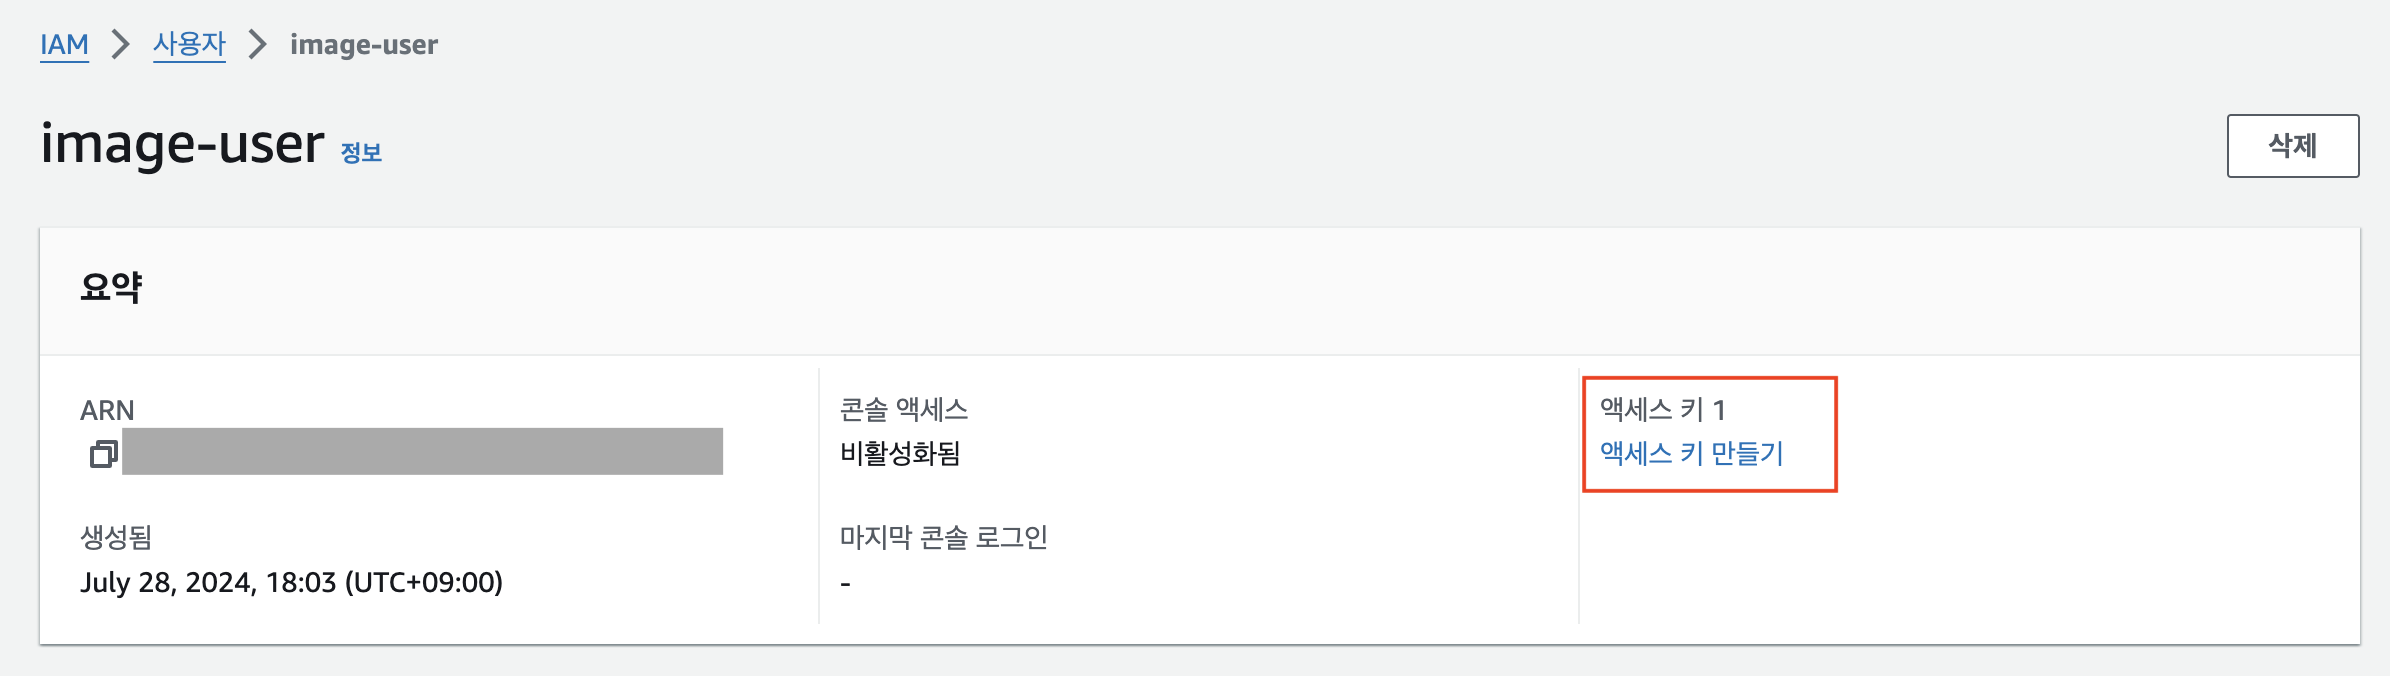
1. S3 버킷 생성, IAM 액세스키 발급
버킷 생성에 관한 내용을 정리해놓은 글들은 많이 있어서 자세한 설명은 생략한다.
S3 버킷을 생성하고 S3FullAccess를 허용하고, IAM 생성 후 액세스키를 발급했다.
2. Spring Boot 프로젝트 연동하기
1) build.gradle에 의존성 추가
implementation 'org.springframework.cloud:spring-cloud-starter-aws:2.2.6.RELEASE'
2) application.yml에 aws 정보 추가
cloud:
  aws:
    credentials: # IAM으로 생성한 시크릿키 정보를 입력한다.
      access-key: ${S3_ACCESS_KEY}
      secret-key: ${S3_SECRET_KEY}
    S3:
      bucket: ${S3_BUCKET_NAME} # bucket 이름을 설정한다.
    region:
      static: ${S3_REGION} # bucket이 위치한 AWS 리전을 설정한다.
    stack:
      auto: false # 자동 스택 생성 기능 사용여부를 설정한다. (자동 스택 생성: 애플리케이션이 실행, 배포될 때 인프라 리소스를 자동으로 생성하고 설정하는 것)
3) config 생성
@Configuration
public class S3Config {

    @Value("${cloud.aws.credentials.access-key}")
    private String accessKey;

    @Value("${cloud.aws.credentials.secret-key}")
    private String accessSecret;

    @Value("${cloud.aws.region.static}")
    private String region;

    @Bean
    public AmazonS3 s3Client() {
        AWSCredentials credentials = new BasicAWSCredentials(accessKey, accessSecret);

        return AmazonS3ClientBuilder.standard()
                .withCredentials(new AWSStaticCredentialsProvider(credentials))
                .withRegion(region)
                .build();
    }
}
4. service 생성
@Service
@RequiredArgsConstructor
@Slf4j
public class S3Service {

    // Config에서 s3Client라는 이름으로 등록된 bean을 사용한다.
    private final AmazonS3 s3Client;

    @Value("${cloud.aws.s3.bucket}")
    private String bucket;

    public String upload(MultipartFile multipartFile, String dirName) throws IOException {
        // (1) MultipartFile을 File로 변환
        File uploadFile = convert(multipartFile)
                .orElseThrow(() -> new IllegalArgumentException("MultipartFile -> File 전환에 실패했습니다."));

        // (2) 파일 이름 중복을 방지하기 위해 UUID 값으로 설정(현재 DB의 길이 제한으로 UUID값만 저장하도록 해두었다. 필요에 따라 수정 예정)
        String randomName = UUID.randomUUID().toString();
        String fileName = dirName + "/" + randomName;

        // (3)S3에 파일을 업로드. 업로드 완료 여부와 관계 없이 (1)에서 임시 경로에 생성된 파일을 삭제
        try {
            return putS3(uploadFile, fileName);
        } finally {
            removeNewFile(uploadFile);
        }
    }

    private Optional<File> convert(MultipartFile file) throws IOException {
        // 임시 경로에 file을 생성한다.
        File convertFile = new File(System.getProperty("java.io.tmpdir"), file.getOriginalFilename());

        // MultipartFile의 내용을 convertFile에 작성한다.
        if (convertFile.createNewFile()) {
            try (FileOutputStream fos = new FileOutputStream(convertFile)) {
                fos.write(file.getBytes());
            }
            return Optional.of(convertFile);
        }
        return Optional.empty();
    }

    private String putS3(File uploadFile, String fileName) {
        // S3에 파일을 업로드한다.
        s3Client.putObject(new PutObjectRequest(bucket, fileName, uploadFile)
                .withCannedAcl(CannedAccessControlList.PublicRead));

        // 업로드된 파일의 경로를 가져온다.
        return s3Client.getUrl(bucket, fileName).toString();
    }

    private void removeNewFile(File targetFile) {
        if (targetFile.delete()) {
            log.info("파일이 삭제되었습니다.");
        } else {
            log.info("파일이 삭제되지 못했습니다.");
        }
    }
}
5) DTO, Controller, Service, Repository 생성
Member와 관련된 클래스들을 작성한다.
기본적인 CRUD 기능이므로 자세한 설명은 생략했다. 다만 DTO와 Controller, Service 는 다음과 같이 구성했다.
@ModelAttribute를 통해 DTO를 받아오는 형태로 작성했다. 이 부분은 필요에 따라 수정 가능하다.
// DTO
public record MemberRequest(String name, MultipartFile imageFile, String description) {
}

// Controller
@RestController
@RequiredArgsConstructor
@RequestMapping("/member")
public class MemberController {

    private final MemberService memberService;

    @PostMapping
    public MemberResponse createMember(@ModelAttribute MemberRequest memberRequest) throws IOException {
        MemberRequest request = new MemberRequest(
                memberRequest.name(),
                memberRequest.imageFile(),
                memberRequest.description()
        );
        return memberService.createMember(request);
    }
}

// Service
@Service
@RequiredArgsConstructor
public class MemberService {

    private final MemberRepository memberRepository;
    private final S3Service s3Service;

    public MemberResponse createMember(MemberRequest request) throws IOException {
        String savedImageURI = s3Service.upload(request.imageFile(), "image");

        Member member = new Member(0L, request.name(), savedImageURI, request.description());
        Member savedMember = memberRepository.save(member);

        return new MemberResponse(savedMember);
    }
}
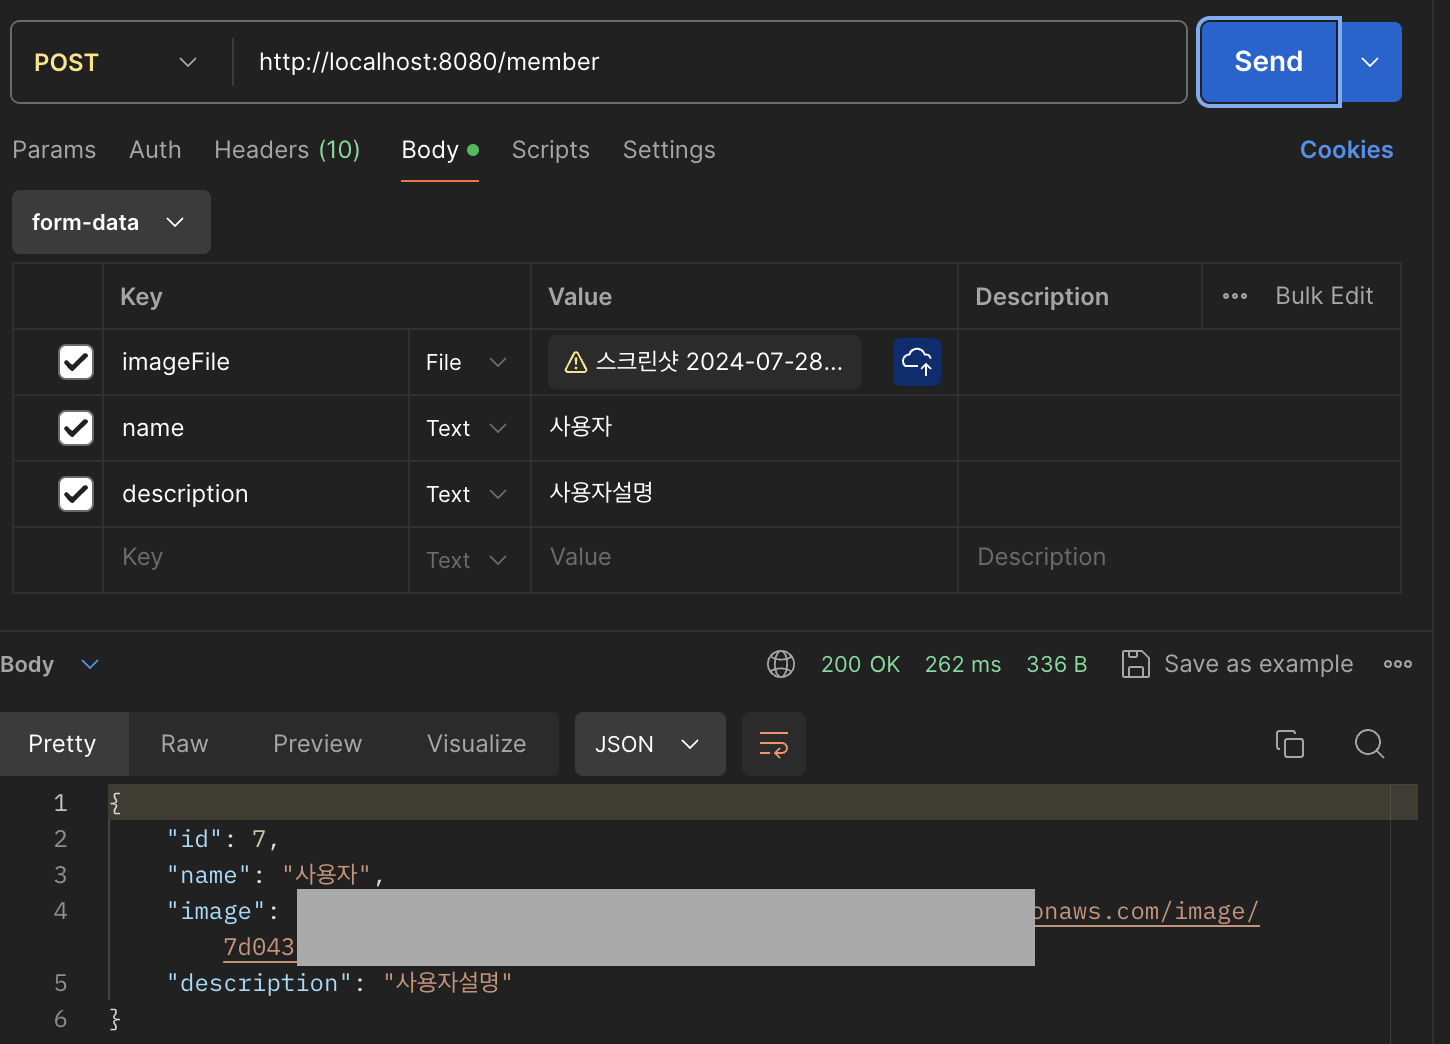
6) 이미지 업로드 확인
포스트맨과 S3버킷을 을 활용해 업로드 결과를 확인했다.
body 탭에서 form-data를 사용해서 파일을 업로드했고, 정상적으로 등록되는 것을 확인할 수 있었다.
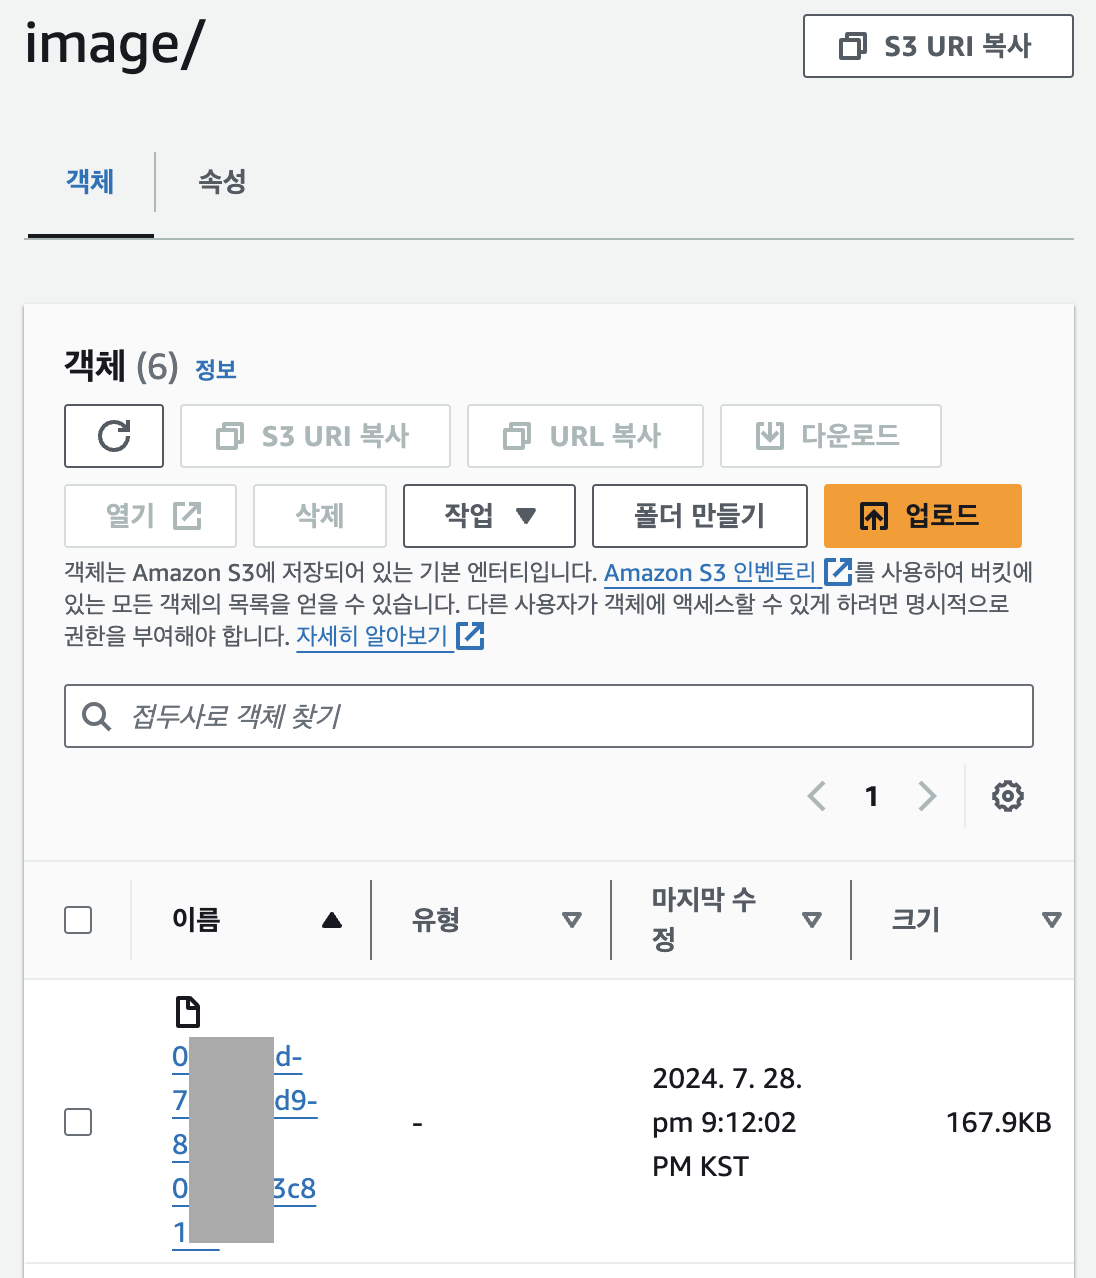
지금은 보안 설정을 해두지 않아서 이미지 경로를 통해 실제 이미지 확인이 가능하다.
그러나 모든 접근을 public으로 열어두는 것은 보안상 좋지 않은 선택이다.
다음 포스팅에서 접근이 제한된 bucket을 어떻게 활용할 수 있을지 다룰 예정이다.
7/29 추가 내용
AmazonS3 대신 S3Client를 사용하도록 수정했다. put, get 등 요청에 맞는 ObjectRequest를 만들어 요청하는 방식을 사용한다.
자세한 코드는 아래와 같다.
1) build.gradle 의존성 변경
implementation "software.amazon.awssdk:s3:2.13.0"
2) Config 파일 수정
만약 아래와 같이 S3Client를 생성할 때 IAM에서 SecretKey를 직접 가져올 수 없다면, credentialsProvider()에 아래 코드를 넣어 실행중인 환경에서 AWS 자격 증명을 가져와 적용할 수 있다. 자격 증명을 코드에 포함하지 않아도 되므로 보안 측면에서 유리하다.
DefaultCredentialsProvider.create()
@Configuration
public class S3ClientConfig {

    @Value("${cloud.aws.credentials.access-key}")
    private String accessKey;

    @Value("${cloud.aws.credentials.secret-key}")
    private String secretKey;

    @Value("${cloud.aws.region.static}")
    private String region;

    @Bean
    public S3Client s3Client() {
        AwsBasicCredentials credentials = AwsBasicCredentials.create(accessKey, secretKey);

        return S3Client.builder()
                .region(Region.of(region))
                .credentialsProvider(StaticCredentialsProvider.create(credentials))
                // 만약 실행중인 환경에서 AWS의 자격 증명을 가져오려면 위 코드 대신 아래 아래 코드를 사용하면 된다.
                // .credentialsProvider(DefaultCredentialsProvider.create())
                .build();
    }
}
3) S3Service 수정
@Service
@RequiredArgsConstructor
public class S3ClientService {

    private final S3Client s3Client;

    @Value("${cloud.aws.s3.bucket}")
    private String bucket;

    public String upload(MultipartFile multipartFile) throws IOException {

        String randomName = UUID.randomUUID().toString();

        String dirName = "image"; // 이미지 폴더에 저장하기 위해 경로를 지정했다.
        String fileName = dirName + "/" + randomName;

        PutObjectRequest putObjectRequest = PutObjectRequest.builder() // put 요청을 하기 위한 request
                .bucket(bucket)
                .key(fileName)
                .contentType(multipartFile.getContentType())
                .contentLength(multipartFile.getSize())
                .build();

        s3Client.putObject(putObjectRequest, RequestBody.fromBytes(multipartFile.getBytes()));// s3에 업로드

        GetUrlRequest request = GetUrlRequest.builder().bucket(bucket).key(fileName).build(); // s3에서 주소를 받아오기 위한 request

        return s3Client.utilities().getUrl(request).toString(); // 업로드된 파일 주소 리턴
    }
}
참고자료
https://docs.aws.amazon.com/AmazonS3/latest/API/API_PutObject.html#API_PutObject_RequestSyntax
[AWS] 이미지 저장을 위한 S3 버킷 생성 및 SpringBoot(Gradle)에 연동하기
[AWS] Spring Boot에서 AWS S3로 이미지 저장하기
'우아한테크코스 > 레벨 3 - 프로젝트' 카테고리의 다른 글
| [JPA] QueryDSL로 리스트 여러개 있는 데이터 가져오기 (0) | 2024.08.18 |
|---|---|
| [트러블슈팅] TLS/SSL Handshake Failed (안드로이드-서버) (0) | 2024.08.11 |
| [Git] Git branch 전략 (부제: branch 병합 방법 merge, rebase, squash) (1) | 2024.07.24 |
| [CI/CD] Github Actions와 Docker를 활용한 CI/CD 구축, Self-Hosted Runner 적용 (0) | 2024.07.15 |


