이제 기능이 어느정도 완료되어서 코드 리팩토링을 시작했다.
다른 팀원분들과 구현 방식이 다른 부분이 있어 해당 부분을 통일시켰다.
또한 권한 관련 로직을 추가했다.
처음 프로젝트를 기획할때에는 고객, 사업자로 구분해서 가입을 받으려고 했으나 일정을 고려해서 해당 기능은 제외했었다.
그런데 생각보다 백엔드쪽 로직이 빨리 구현되어서 추가로 어떤걸 할 수 있을까 고민하다가 예전에 얘기 나왔던 채팅 기능을 추가해봐도 좋을것같다는 얘기가 나왔다.
아직 프론트쪽 작업이 완료되지 않아서 실제로 적용될 수 있을지는 모르겠지만 임의로 사업자 회원을 하나 만들어두고
사업자 - 다른 회원간의 채팅을 구현해보는걸 얘기해보고 있다.
그런데 만약 그 기능이 들어가려면 회원의 권한을 구분해주어야하는데 현재까지 구현된 코드에는 그 내용이 없다.
(MEMBER엔티티에만 들어있고 해당 정보를 사용하는곳은 없었다.)
그래서 AccessToken을 검증하고 SecurityContextHolder에 인증 정보를 저장할때 권한 정보도 함께 저장하는 로직을 추가해두었다.
1. JwtUtils
AccessToken의 claims 정보중에 role 정보를 가져와서 권한 정보로 바꾸어주는 메서드를 추가했다.
현재 Member 엔티티에 Role은 String의 Enum 타입으로 정의되어있다.
해당 정보를 가져와서 List<GrantedAuthority> 타입으로 변경해주었다.
Spring Security에서 권한 정보를 적용할 때 [ROLE_권한이름]과 같이 ROLE_ 이 붙어있는 내용을 기준으로 작동한다.
(실제로, ROLE_을 붙이지 않고 권한정보를 생성한 뒤 Spring Security에서 hasRole(권한이름)로 조건을 걸었을때 작동하지 않았다.)
public class JwtUtils {

    ...

    public List<GrantedAuthority> createAuthorities(Jws<Claims> claims) {
        Object role = claims.getBody().get("memberRole");
        GrantedAuthority authority = new SimpleGrantedAuthority("ROLE_" + role);
        List<GrantedAuthority> authorities = Collections.singletonList(authority);
        return authorities;
    }
}
2. JwtVerificationFilter
AccessToken 검증이 완료되면 SecurityContextHolder에 인증 정보를 저장하게 되는데 이 때 권한정보도 추가해주었다.
@Slf4j
public class JwtVerificationFilter extends OncePerRequestFilter {
    ...

    private void setAuthenticationToContext(Jws<Claims> claims) {
        Long memberId = claims.getBody().get("memberId", Long.class);
        List<GrantedAuthority> authority = jwtUtils.createAuthorities(claims); // 추가된 부분
        Authentication authentication = new UsernamePasswordAuthenticationToken(memberId, null, authority); // 추가된 부분
        SecurityContextHolder.getContext().setAuthentication(authentication);
    }
}
3. SecurityConfiguration
URL별로 접근 가능한 권한을 다르게 설정해보았다.
@Configuration
@EnableWebSecurity
public class SecurityConfiguration implements WebMvcConfigurer {
...
@Bean
public SecurityFilterChain filterChain(HttpSecurity http) throws Exception {
http
.headers().frameOptions().sameOrigin()
.and()
.cors(withDefaults())
.csrf().disable()
.formLogin().disable()
.httpBasic().disable()
.sessionManagement().sessionCreationPolicy(SessionCreationPolicy.STATELESS)
.and()
.exceptionHandling()
.authenticationEntryPoint(new MemberAuthenticationEntryPoint())
.and()
.apply(new CustomFilterConfigurer())
.and()
.logout().disable()
.authorizeHttpRequests(authorize -> authorize
.antMatchers("/members/**").hasRole("CUSTOMER") // "/members/*" 경로에는 CUSTOMER 권한을 가진 사용자만 접근 가능하다.
.anyRequest().permitAll());
return http.build();
}
...
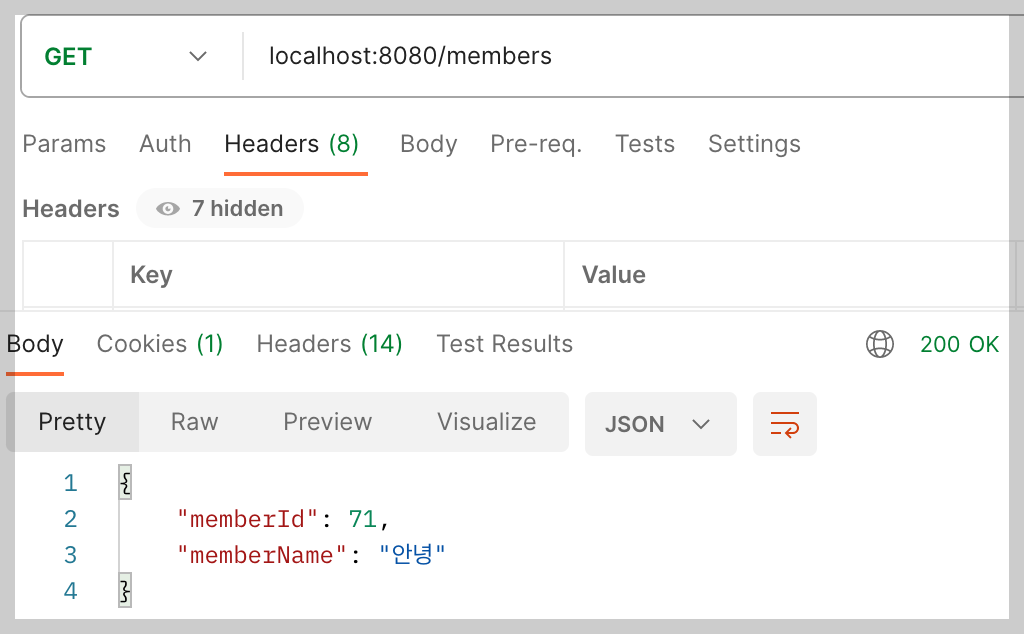
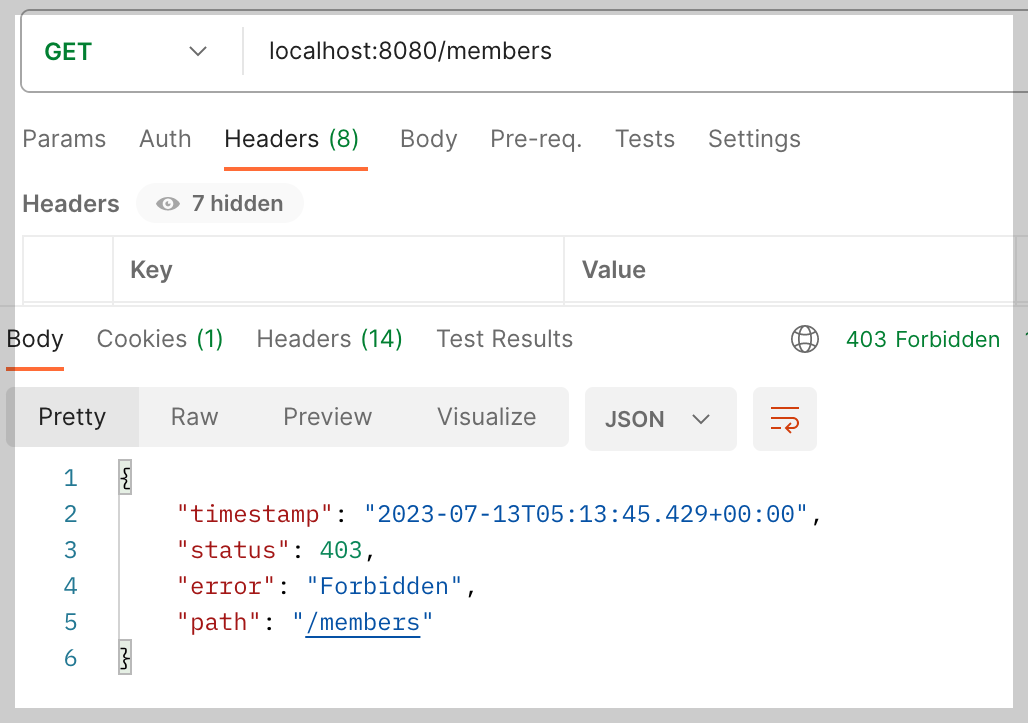
}[결과확인]
CUSTOMER 권한을 가진 회원은 회원 정보 조회가 됐지만, ADMIN 권한을 가진 회원은 접근이 제한되었다.
실제 로그에도 [ROLE_CUSTOMER], [ROLE_ADMIN]으로 잘 확인되었다.
만약 나중에 관리자용 채팅 페이지를 만든다면, 해당 페이지에는 적절한 권한이 있는 사용자만 접근할 수 있도록 제한할 수 있다.
'부트캠프 개발일기 > Main-Project' 카테고리의 다른 글
| 107일차: Main-Project Day 14 (마이페이지 API 설계) (0) | 2023.07.17 |
|---|---|
| 106일차: Main-Projcet Day 13 (로그아웃 에러처리) (0) | 2023.07.14 |
| 104일차: Main-Project Day 11 (OAuth2.0 회원가입+로그인 로직 구현) (0) | 2023.07.12 |
| 103일차: Main-Project Day 10 (프론트엔드 쿠키 저장 안됨 해결!) (0) | 2023.07.11 |
| 102일차: Main-Project Day 9 (Google OAuth2.0 회원가입, CSR 방식) (0) | 2023.07.10 |
